If you’re a car owner, you might have come across various maintenance issues, and one of the common problems is a CV boot leaking grease. The constant velocity (CV) joint boot is responsible for protecting the CV joint, which helps in transferring power from the transmission to the wheels. When the CV boot gets damaged or starts leaking grease, it can lead to significant issues with the CV joint and ultimately affect the performance and safety of your vehicle. In this comprehensive guide, we’ll explore the causes, symptoms, and solutions for a CV boot leaking grease, providing you with the necessary knowledge to address this issue promptly.

What is a CV Boot?
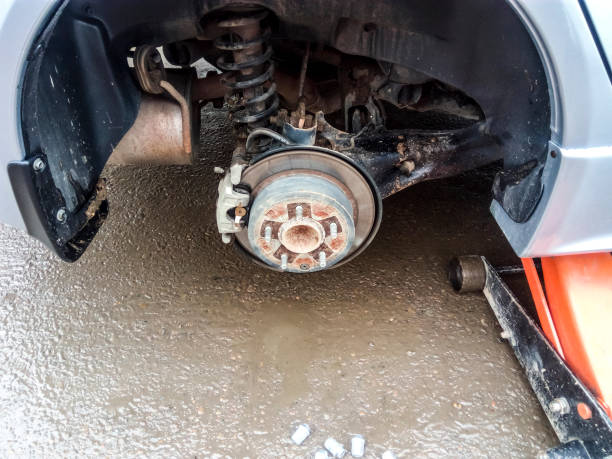
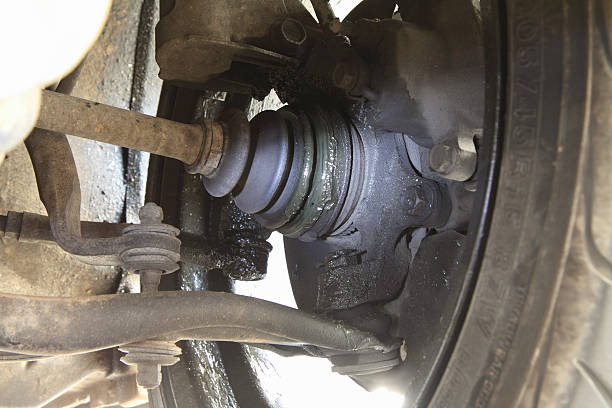
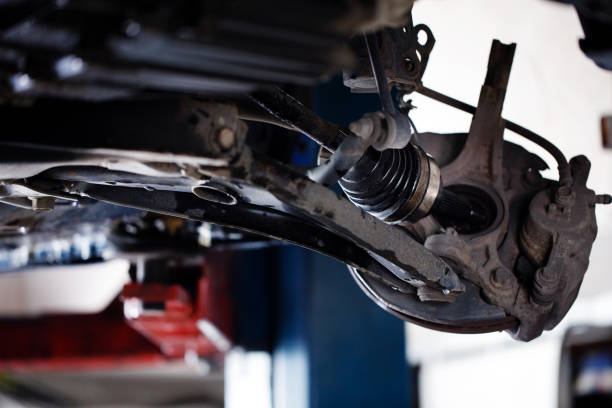
A CV boot, short for constant velocity boot, is a protective cover that surrounds the CV joint, which is responsible for transmitting power from the transmission to the wheels. The CV boot is usually made of flexible rubber or thermoplastic material, designed to protect the CV joint from dirt, debris, and moisture. It also contains grease, which lubricates the CV joint and ensures smooth operation. However, if the CV boot gets damaged or develops a leak, it can result in the loss of grease and potential damage to the CV joint.
Causes of CV Boot Leaks
There are several factors that can cause a CV boot to start leaking grease. Here are some common causes:
- Torn or Worn CV Boot: Over time, the CV boot can deteriorate due to normal wear and tear, leading to cracks or tears. Exposure to extreme temperatures and road debris can accelerate this process.
- Improper Installation: If the CV boot is not installed correctly during previous repairs or maintenance, it may lead to premature failure and leakage.
- Lack of Maintenance: Neglecting regular maintenance, such as lubrication and inspection of the CV boots, can result in the development of leaks.
Symptoms of a CV Boot Leaking Grease
Identifying the symptoms of a CV boot leaking grease is crucial for timely intervention. Here are some signs that indicate a potential CV boot issue:
- Grease Splatters: You might notice grease splatters around the inner edge of the wheel, under the vehicle, or on other components near the CV joint.
- Clicking or Clunking Noises: A worn-out or damaged CV joint due to a leaking boot can produce clicking or clunking noises when turning or accelerating.
- Vibration: If the CV joint becomes damaged or worn, you might experience vibrations, especially during acceleration.
- Loss of Performance: As the CV joint gets exposed to contaminants and loses lubrication, it can result in a loss of performance and reduced power transfer to the wheels.
How to Diagnose a CV Boot Leak
When you suspect a CV boot leak, it’s essential to confirm the issue before taking appropriate action. Here’s how you can diagnose a CV boot leak:
- Visual Inspection: Carefully examine the CV boots for signs of damage, such as cracks, tears, or grease splatters.
- Road Test: Take your vehicle for a test drive and pay attention to any unusual noises, vibrations, or handling issues.
- Professional Inspection: If you’re unsure or unable to diagnose the issue yourself, consult a qualified mechanic who can thoroughly inspect the CV boots and joints using specialized tools.
Repairing a CV Boot Leak
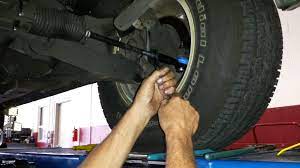
Once you’ve confirmed a CV boot leak, it’s crucial to address the issue promptly to prevent further damage. Here are the steps involved in repairing a CV boot leak:
- Gather Necessary Tools: You’ll need a CV boot replacement kit, which typically includes a new boot, clamps, grease, and any required hardware. Additionally, you’ll need basic hand tools like pliers and sockets.
- Remove the Damaged Boot: Follow the manufacturer’s instructions to safely remove the damaged CV boot without causing further harm to the CV joint.
- Clean and Inspect the CV Joint: Thoroughly clean the CV joint to remove any dirt or debris. Inspect the joint for any signs of damage or excessive wear.
- Install the New Boot: Carefully install the new CV boot using the provided clamps and hardware. Ensure a proper fit and secure the clamps tightly.
- Grease the CV Joint: Apply the recommended amount of grease to the CV joint using the appropriate lubricant. Be sure to use the specified type of grease for your vehicle.
- Reassemble and Test: Reassemble the components, ensuring everything is properly tightened. Take your vehicle for a test drive to ensure the repair was successful.
Preventing CV Boot Leaks
While it’s not always possible to prevent CV boot leaks entirely, taking proactive measures can significantly reduce the risk. Here are some preventive steps you can take:
- Regular Inspections: Include CV boot inspections as part of yourroutine vehicle maintenance. Check for any signs of damage, cracks, or leaks.
- Lubrication: Ensure that the CV boots are properly lubricated according to the manufacturer’s recommendations. This helps maintain the integrity of the boots and prevents them from drying out.
- Avoid Off-Road Driving: If possible, avoid driving on rough terrains or off-road conditions that can increase the chances of CV boot damage.
- Protective Measures: Consider installing protective covers or guards for the CV boots to shield them from potential damage caused by debris or road hazards.
- Prompt Repairs: If you notice any signs of a CV boot leak, address the issue promptly. Ignoring it can lead to more severe damage to the CV joint and result in costly repairs.
Frequently Asked Questions
FAQ 1: Can I continue driving with a CV boot leaking grease?
It’s not recommended to continue driving with a CV boot leaking grease. The loss of lubrication can damage the CV joint and affect the performance of your vehicle. It’s best to address the issue as soon as possible to prevent further damage.
FAQ 2: How much does it cost to replace a CV boot?
The cost of replacing a CV boot can vary depending on factors such as the make and model of your vehicle, the labor charges, and whether you choose an OEM (Original Equipment Manufacturer) or aftermarket replacement part. On average, the cost can range from $150 to $300, including parts and labor.
FAQ 3: Is it possible to repair a CV boot without replacing it?
In some cases, it may be possible to repair a CV boot without replacing it, especially if the damage is minimal. There are CV boot repair kits available that include patches or sealants designed to fix small cracks or tears. However, it’s important to note that these repairs may not be a permanent solution, and replacing the boot is often the recommended option.
FAQ 4: Can I use a universal CV boot kit for repair?
Yes, universal CV boot kits are available in the market, and they can be used for repair in certain situations. These kits offer flexibility and compatibility with various vehicle makes and models. However, it’s crucial to ensure that the universal boot fits properly and provides adequate protection for the CV joint.
FAQ 5: How long does a CV boot repair typically take?
The time required to repair a CV boot can vary depending on factors such as the complexity of the repair, the accessibility of the CV joint, and the experience of the mechanic. On average, a CV boot repair can take anywhere from 1 to 3 hours.
FAQ 6: Should I replace both CV boots at the same time?
It’s generally recommended to replace both CV boots at the same time, even if only one is leaking or damaged. This ensures balanced wear and extends the lifespan of the CV joints. Replacing both boots simultaneously can save you from potential future repairs and associated costs.
Conclusion
A CV boot leaking grease is a common issue that can affect the performance and safety of your vehicle. By understanding the causes, symptoms, and solutions discussed in this guide, you’re equipped with the knowledge to identify and address CV boot leaks promptly. Regular inspections, timely repairs, and preventive measures can help maintain the integrity of the CV boots and ensure optimal performance of your vehicle’s drivetrain. Remember, if you’re uncertain or uncomfortable performing the repairs yourself, it’s always best to consult a qualified mechanic for assistance.